


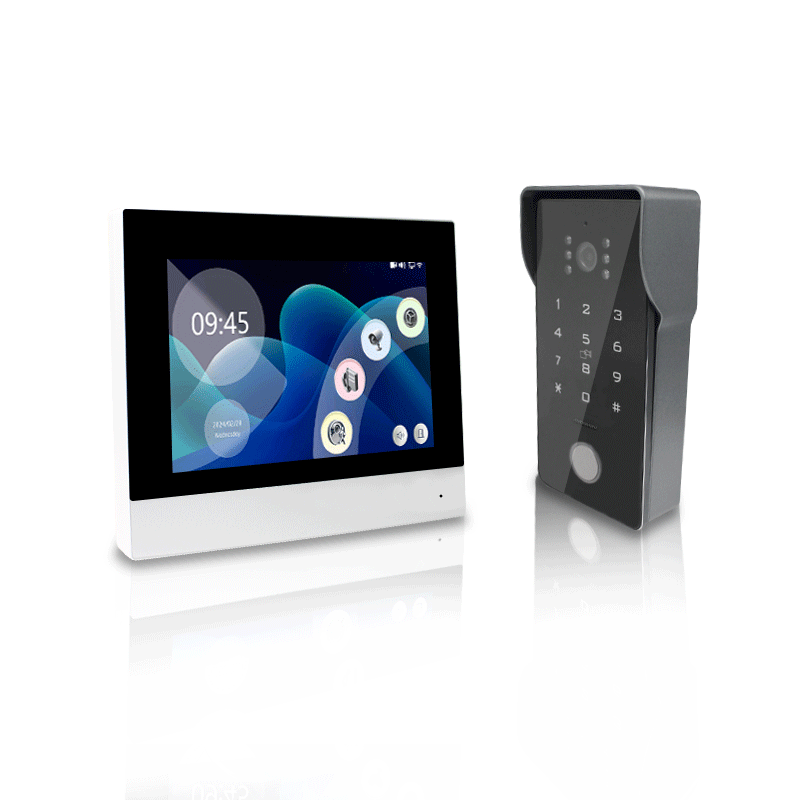
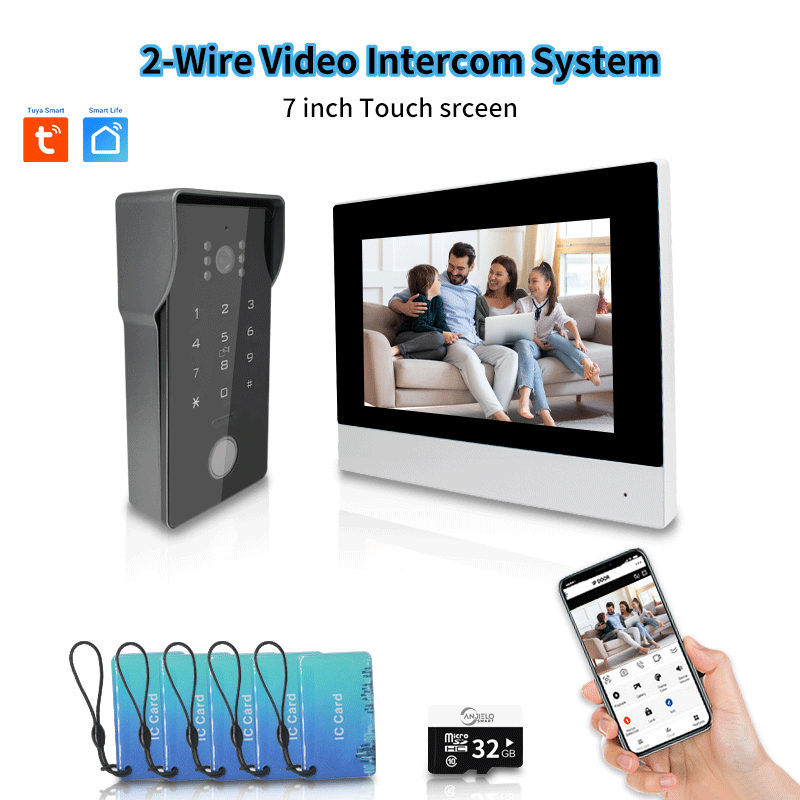
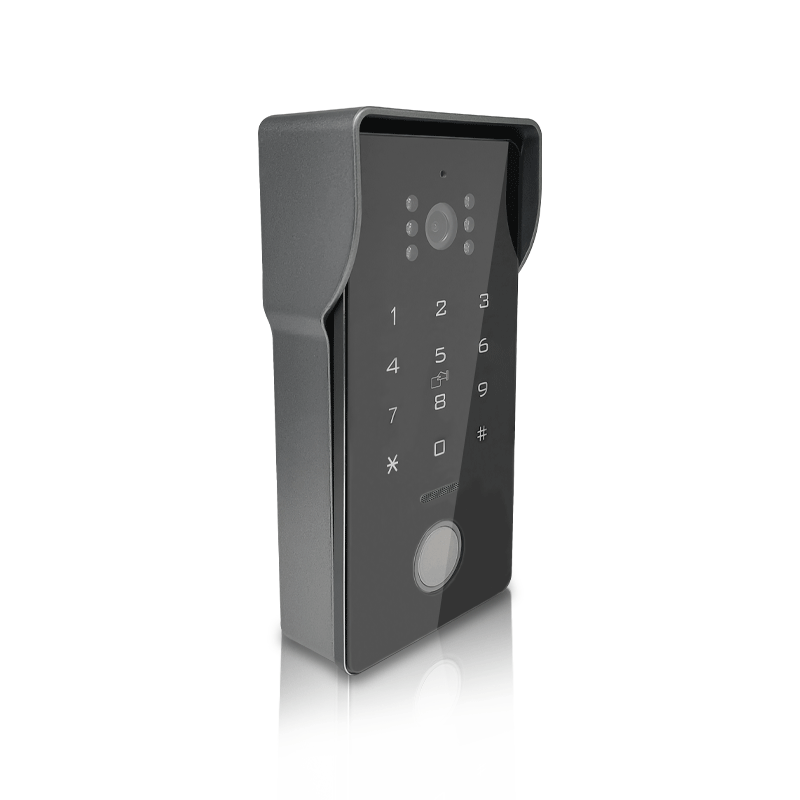
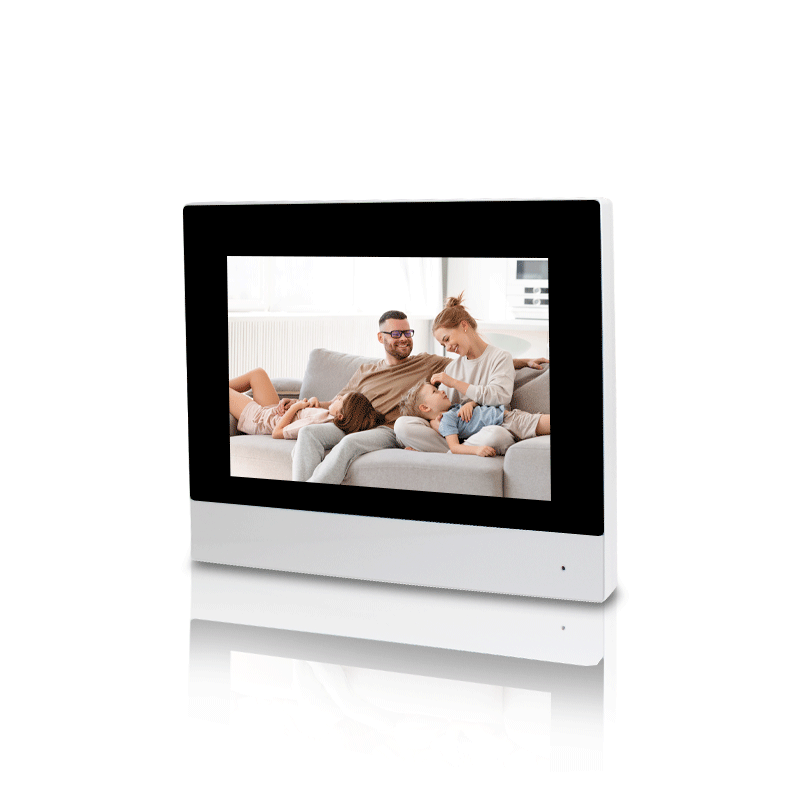
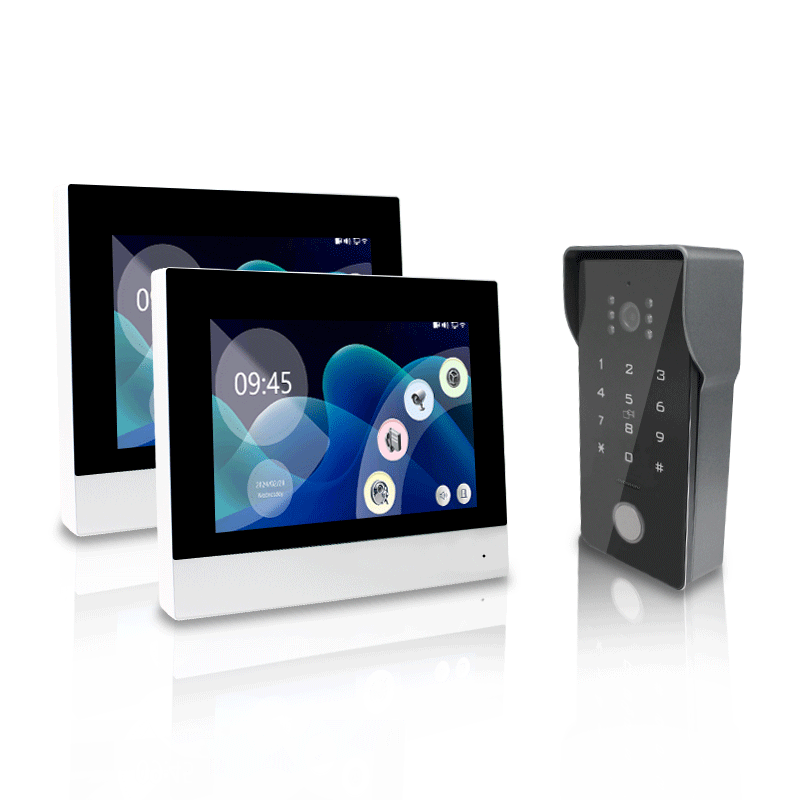
Anjielo Smart 2-Draht-Video-Gegensprechanlage, kabellos, 7-Zoll-IPS-LCD-Bildschirm, RFID-Entriegelung, Nachtsicht, Tuya Smart Wifi-Video-Türklingel, 1080P
Anjielo Smart 2-Draht-Video-Gegensprechanlage, kabellos, 7-Zoll-IPS-LCD-Bildschirm, RFID-Entriegelung, Nachtsicht, Tuya Smart Wifi-Video-Türklingel, 1080P
Verfügbarkeit für Abholungen konnte nicht geladen werden


 12. IPC:


Buyer Questions & Answers
Buyer Questions & Answers
Q: Are you a real manufacturer/factory?
A: Yes, our company specializes in producing smart home smart security real manufacturer/factory.
Q: Are you able to provide OEM&ODM service?
A: Yes, we are able to provide OEM&ODM service and to provide professional advices to both product design&marketing and business planning.
Q: How to place an order if I want to buy some product from you?
A: You can place an order directly on our website, or contact us directly for offline purchase (customized and ready to ship products), after you confirm the products you want to buy from us, I will send you a proforma invoice or contract, or you send us a contract.
Q: How to delivery goods to me?
A: We provide delivery by airplane, by train and by ship.
Q: What's your delivery time?
A: Negotiable
Q: What terms of payment do you offer?
A: Negotiable
Q: Hello, I don't know the unlock code of the device, it's six numbers.111111, 222222, 123456 are not correct, please let me know.
Q:Does anyone know the default pass to open the door using Tuya?
A:Hello, the initial password is 888888.
Q: Can connect to 5G wifi?
A:NO,ONLY 2.4G wifi can be used.
Q:I'm not capable. I don't activate the wifi on the monitor
A: Hello, in this case, the wifi of the screen is not successfully connected, you need to contact the seller or technical staff ,Add whatsapp:+8615913473606 it is best to shoot a video in advance, so that we can quickly tell you the solution
Q:What kind of cable to use to connect the screen to the phone?
A:Hello, you can use the cable from our store, https://anjielo.myshopify.com/admin/products/6064868556959
which is better, or CAT5 OR CAT6, but there will be requirements for length and quality, please contact the seller for details
Q:How to connect to Tuya?
Product Support :YouTube:www.youtube.com/@anjielosmart
TikTok: Search "Anjielo Smart" on TikTok Email : yuyunzhu@anjielo.com; sales@anjielo.com,Or add whatsapp:+8617336198736
Q:During the process of adding a device, it shows that there is no permission to add a device, what should I do?
A: Hello, first click on the network on the screen, select the DEFAULT option, restart the screen to add the device again, if you still cannot add the device, please contact the seller
Q:The doorbell keeps ringing
A:If the outdoor station does not have a card swipe function, the outdoor station needs to be set to “don’t support access card” mode;If the outdoor station supports card swiping, the outdoor station needs to be set to “support card “ mode.
Q:When someone presses the doorbell, the device is working but the doorbell does not ring.
A:Please set the screen to home screen mode, the doorbell will ring when you press the doorbell;If the doorbell is set to message mode, it will not ring when you press the doorbell.
Q:The distance between my doorbell and the screen is a bit far, and the image is blurry. What should I do?
A:If the distance between the screen and the doorbell exceeds 30 meters, the doorbell needs to be powered separately.
Q:I purchased two screens, how do I install them?
A:Set the screen connected to the doorbell as the main screen, set the digital ID to 1, connect the next screen using the out port, connect the second screen to the in port, and then change the digital ID to 2
Q:My video is blurry, black and white, or even no image. What should I do?
A:Please set the settings to PAL 1080 and automatic, or you can adjust it on the back of the doorbell https://www.youtube.com/watch?v=OY1BSGgwSkc
Q:How do I add my fingerprint and password?
A:Please refer to this video https://www.youtube.com/watch?v=8Adt1uQd53Q,
Q:What should I do if my device suddenly cannot connect to the Internet?
A:Power off and restart the device, or update the system.
Q:My video intercom has been working fine for two weeks, but suddenly I can't hear anyone else's voice coming through the doorbell. What's the reason?
A:Please check the line settings to see if the audio cable is dropped or has poor contact or falls off. You can also plug it into door2
Q:My lock is connected to the doorbell, but it won't open the door. What's going on?
A:Please check if there is any error in the wiring. If it cannot be unlocked when connected to the 2PIN port, please connect to the 3PIN port to power the lock. At the same time, you also need to pay attention to distinguish between NO and NC.
Q:I bought 64218+61010, connected it to the power supply, and found that the LED indicator on the screen did not light up. What is the reason?
A:Please note that if you buy 64218 or 64202, there is a separate 2PIN line. We pack them separately and mark them before delivery. You cannot use the doorbell's 2PIN line to connect to the screen's power supply because their positive and negative poles are opposite. The correct connection should be the red line close to the LED indicator. If the connection is correct and it still doesn't light up, it may be a problem with the motherboard.
Q:Does the smart central control panel support Bluetooth connection?
A;Yes, but the Bluetooth function is different.
Receive function: (can connect to mobile phone, can not connect to Bluetooth speaker: Q7)
Transmit function (can connect to Bluetooth speaker, can not connect to mobile phone: 10 inch, 12 inch
Transmitter and receiver: (4 inch, 6 inch (F6), 6.8 inch, 7 inch (F7), 8 inch (F8)
Q:Does the video intercom device support connecting to sliding doors? If so, how can I connect it?
A:Support. Use door bell “COM” and “NO” two wired connect to silding gate opener
Q:Hello, since there are power outages here from time to time, can I use a DC12V battery pack to power the video intercom equipment?
A:The video intercom doorbell is not low power and needs continuous power supply, and video transmission requires a larger current, so it cannot be powered by a battery pack.
Buy Butten
Buy Butten

Video Doorbell Video intercom Anjielo Smart Home
Video Intercom System Tuya Smart Life Video Doorphone
Anjielo Smart Security Tuya Video intercom Anjielo Smart Life

Amazon-USA Amazon-UK Amazon-DE Amazon-JP

Shopee-My Shopee - Ph Shopee - Br Shopee - Vn
Shopee-Mx Shopee - Co Shopee - Cl Shopee -TH
Shopee-SG Shopee-PH2 Shopee-PH3 Shopee-MX2

LAZADA-My LAZADA - PH LAZADA - ID LAZADA - SG
LAZADA-TH LAZADA - VN LAZADA - Cl LAZADA -CO

ANJIELOSMART-1Store ANJIELOSMART-2Store ANJIELOSMART-3Store
Shipping & Returns
Shipping & Returns

Anjielo Smart Technology Buyer Protection and Warranty Policy applies to all purchases from Anjielosmart.com. It describes your rights to return, refund, and warranty service, as well as your responsibilities for proper installation and use.
For customers in the European Union (EU) or United States (US) , specific provisions may apply as noted below. Nothing in this policy limits any mandatory consumer rights under the laws of your country of residence.
Section 1 – Money-Back Guarantee (30-Day Quality Guarantee)
Section 1 – Money-Back Guarantee (30-Day Quality Guarantee)
We want you to be completely satisfied. If the item you receive is not as described, or if you simply change your mind, you may request a return under the terms below.
1.1 Eligibility
You must contact us within 30 days of receiving your product.
The product must be unused, unmodified, and in original condition – including original packaging, tags, and all accessories.
Products that show signs of improper installation, wiring damage, or physical abuse are not eligible for money-back return.
1.2 How to Return for a Refund
Email sales5@anjielo.com or you can contact us via WhatsApp +8617336198736 with your order number and reason for return.
We will provide a return authorization and local return address (if available in your country).Ship the product back within 14 days after receiving return instructions.
1.3 Refund Amount
Refund = product purchase price (excluding original shipping fees).
Free Return service (where offered) applies only if the product is in new, resalable condition.
If our inspection shows damage caused by you (including incorrect wiring), we will deduct repair costs or deny the refund.
1.4 EU 14-Day Right of Withdrawal
If you are a consumer in the EU, you have a 14-day cooling-off period to withdraw from the purchase without giving any reason. The right of withdrawal ends 14 days after you (or a person you designate) take physical possession of the goods. You must bear the direct cost of returning the goods, unless we offered free return. This statutory right is not affected by our 30-day guarantee, but the product must not show damage from misuse or improper installation.
Section 2 – Limited Warranty (18 Months)
We warrant that the product is free from defects in materials and workmanship under normal, intended home use for the following periods from the original purchase date:
Use Type Warranty Period
Normal household use 18 months
Commercial / business use 12 months
2.1 What IS Covered
Hardware failures due to manufacturing defects.
Functional defects in pre-installed software.
Battery capacity degradation below 70% of rated capacity under normal use.
2.2 What IS NOT Covered – Important Exclusions
This limited warranty does not cover any problem caused by or resulting from the following (this list is determinative in any dispute):
⚠️ Installation & Wiring Errors (most common cause of “no power / not working”)
Incorrect, reversed, or loose electrical wiring.
Use of incompatible power supply or voltage mismatch.
Connection of any third-party device (e.g., electric locks, magnetic locks, strikes) to the doorbell without a separate, dedicated power supply for that device.
Failure to follow the written installation instructions.
Short circuits, electrical surges, or overheating caused by the above.
Physical Damage & Misuse
Drops, impacts, liquid immersion, or corrosive environment.
Scratches, dents, or normal wear and tear.
Unauthorized modification, disassembly, or repair.
External & Environmental Factors
Force majeure (lightning, flood, fire, etc.).
Problems with existing home wiring, network, or internet service.
Software viruses or third-party applications.
Other Exclusions
Defaced or missing product serial number / anti-tamper label.
Any product where the defect cannot be reproduced during our testing.
Consequential or indirect losses (e.g., data loss, property damage, third-party fees).
2.3 Warranty Claim Process – Your Responsibilities
To make a warranty claim, you must:Contact sales5@anjielo.com or you can contact us via WhatsApp +8617336198736 with your order number, proof of purchase, and a detailed description of the issue.
If the issue involves “no power”, intermittent operation, or failure to ring/chime:
You agree to perform basic troubleshooting as we instruct, which may include:
Testing the doorbell with a short known-good cable and without any connected electric lock or accessory.
Providing a short video showing the test setup and the problem.
If we determine that further inspection is needed, we will provide a return authorization. You must ship the product to our designated service center.
Testing Period: We will complete our diagnosis within 15 business days of receiving the returned product. For EU customers, this complies with the 30-day repair/refund period under Directive (EU) 2019/771.
2.4 Resolution Options for Valid Claims
If we find a covered defect, we will, at our sole option:
Repair the product, or Replace it with a refurbished or new equivalent model, or Refund the original purchase price (excluding shipping).
2.5 What Happens If the Claim Is Denied?
If our testing shows no defect, or the damage falls under Section 2.2 (exclusions) , the warranty claim will be denied. You will be responsible for:
Return shipping costs to send the product back to you (if you want it returned), or A small service fee for disposal/testing if you do not request return.
Example: If the doorbell has burn marks from a short circuit caused by connecting an electric lock without a separate power supply – claim denied.
Section 3 – Free Return Service (Where Offered)
We offer Free Local Return in selected countries (including US, CA, AU, UK, FR, DE, ES, IT, NL, PL, IL, etc.). This service allows you to return an item to a local warehouse without paying return shipping.
3.1 Conditions for Free Return
The product must be unused, unwashed, in original condition with all packaging.You must request the return within 15 days of receiving the product.
Free Return does NOT apply to:Products damaged by improper installation, wiring errors, or connection of third-party devices.Products where the serial number or seal is broken.Items that have been installed, mounted, or show signs of installation wear.
3.2 How to Use Free Return
Contact us to obtain a return code/label.
Drop off the package at a designated local service point or schedule a pickup.
Once the local warehouse confirms receipt, we process your refund within 5 business days.
Note: Only one free return per order is allowed. If you have multiple items, return them together to avoid extra shipping fees.
Section 4 – Special Provisions for the European Union (EU)
For consumers located in the EU, the following additional rights and clarifications apply, in accordance with Directive (EU) 2019/771 (on sales of goods) and Directive 2011/83/EU (on consumer rights).
4.1 Legal Conformity Warranty (2 Years)
You have a 2-year legal guarantee that the goods conform to the contract at the time of delivery. However, you must prove that the lack of conformity existed at the time of delivery. This is important:If the product is damaged after delivery due to incorrect installation (e.g., wiring an electric lock), that is not a lack of conformity at delivery.
We will assist you in diagnosing, but you bear the burden of proof for the first 12 months in most EU countries (the “reversal of burden” period). After 12 months, you must prove the defect existed at delivery.
4.2 14-Day Right of Withdrawal (Cooling-Off Period)
As stated in Section 1.4, you have 14 days to cancel the purchase. You lose this right if you have installed, mounted, or modified the product beyond what is necessary to inspect it. Simply opening the package is fine; drilling holes, connecting wires, or attaching the doorbell to a wall constitutes “using” the product and may limit your withdrawal rights.
4.3 What Happens if a Warranty Claim Is Legitimate Under EU Law?
If we determine that a defect was present at delivery, we will:Repair or replace the product free of charge, or Provide a proportionate refund.
We will also reimburse necessary shipping costs for the return. However, if our testing shows the defect resulted from an exclusion under Section 2.2, the claim is not a valid legal conformity claim.
Section 5 – Special Provisions for the United States (US)
For consumers in the US, this warranty is a limited warranty and is governed by the Magnuson-Moss Warranty Act and applicable state laws.
5.1 Implied Warranties
Any implied warranties (e.g., merchantability, fitness for a particular purpose) are limited to the duration of this express warranty (18 months). Some states do not allow limitations on how long an implied warranty lasts, so this may not apply to you.
5.2 Limitation of Consequential Damages
We are not responsible for any incidental or consequential damages (such as loss of time, inconvenience, damage to your home wiring, door, or other property). Some states do not allow the exclusion of consequential damages, so this may not apply to you.
5.3 State-Specific Rights
This warranty gives you specific legal rights, and you may also have other rights which vary from state to state (e.g., in California, you may have a right to a replacement or refund for a “major defect” under the Song-Beverly Consumer Warranty Act).
5.4 Installation Warning – US Emphasis
In the US, improper installation is the #1 cause of doorbell failures. We strongly recommend installation by a licensed electrician. If you connect any electric lock or accessory without a separate power supply, you assume all risk of damage. This limited warranty does not cover such damage.
Section 6 – General Provisions (All Customers)
6.1 How to Contact Us
Email: sales5@anjielo.com whatsapp:+8617336198736 Please include your order number and photos/videos of the issue when possible.
6.2 Governing Law & Dispute Resolution
For EU customers: Your mandatory consumer rights are governed by the law of your country of residence. Any additional terms are governed by the laws of the seller‘s location (China/EU entity, as stated on your invoice).
For US customers: This warranty is governed by the laws of the state of the seller’s registered address (or Delaware, if specified). Any dispute shall first be attempted to be resolved through binding arbitration upon either party‘s request, instead of court.
6.3 Changes to This Policy
We may update this policy from time to time. The version applicable to your purchase is the one in effect on the date of your order.
6.4 No Waiver
If we do not enforce any part of this policy, that does not waive our right to enforce it later.
This policy is intended to be fair to both honest customers and the seller. It protects you against real defects, while protecting us against damage caused by incorrect installation or misuse – which is the most common issue with video doorbells.
Contact Us
Contact Us
ANJIELO SMART ist bestrebt, bei jedem Kontakt die besten Dienstleistungen zu erbringen!

Wir sind in der Smart-Home-Branche tätig und bauen auf Vertrauen auf. Dies erreichen wir durch professionelle Kommunikation und erfahrene Unterstützung. Hier erhalten Sie
Collections
-

2-Draht Video-Gegensprechanlage
2-Draht Video-Gegensprechanlage
-

Zentrales Tuya-Bedienfeld
Zentrales Tuya-Bedienfeld


👥 Contact our team
 Luna
Luna


 Jorrine
 George
 Ashling
 Jason
Jason
 Jack
Jack
💡 If you are interested in our products and would like to know more details, please leave a message, and we will get back to you as soon as possible!
 访问网站
访问网站
 产品目录
产品目录
 YouTube